Gourd Art - Happy Halloween!
When is the last time you carved a pumpkin? I’m SURE I’ve carved a pumpkin as a child but those
memories are so fuzzy! A few weeks ago, Jordan and I snagged a few pictures together in a nearby pumpkin patch and that
got me thinking about various gourd art!

Here are a few pumpkin pictures! It was very windy that day so please forgive
the wild hair.
Jordan and I debated whether or not to carve a pumpkin together. I mean…that’s really an activity for kids and
it seems like an awful lot of work and mess to deal with. Still, I just couldn’t resist the idea. We’ve been married for 5 years and together for 9
years before that so it was high time we carved a darn pumpkin together! It's messy but at least it's not that expensive!
So we picked out a pretty pumpkin and Jordan helped me set
up all our tools.
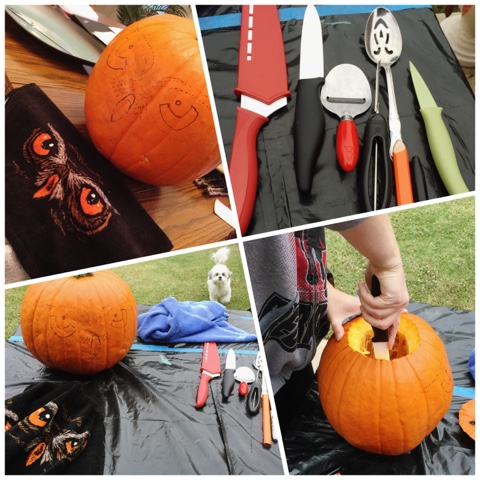
Top Left: I wanted to keep the carving to a minimum. I don’t have time for anything too
detailed or intricate. In the end, we decided to
carve “scary owl eyes” inspired by a Halloween towel I bought years ago.
Top Right: These are all the tools we aside to torture this poor
pumpkin.
Bottom Left: I started out by drawing our design on the
pumpkin. Its much easier to freehand with a marker
than a knife. Those tiny cuts can get tricky!
Bottom Right: By this point I’d finally finished the top lid portion and was getting ready to dig out all the seeds and gunk.
You’ll notice there are a lot of “I” sentences above. Jordan was a good sport (as always) but he didn’t have much interest in the actual carving. He kept me company while I got my hands dirty and thankfully took these pictures!

The inside of a pumpkin is gross!
Top Left: I was digging out all the ewwey gooey stuff. I love Abby's expression. Like she's wondering why we are in the backyard and what this goo smells like!
Bottom Left: The innards. And no, we did not save any of the seeds to eat later.
Bottom Right: The “before” picture
Top Right: The “after” cleaned out picture

Top Left: Jordan got in on the action with a selfie!
Bottom Left: This was about midway through the carving. At this point, I’d finished carving all the
big chunks out. As I said, we kept
the design very simple so we only had 3 pieces to carve out.
Top Right: I couldn’t figure out how to make the eye holes with
the tools that I had so Jordan had a genius idea to use a drill! It worked PERFECTLY! This is my power-tool face.
Bottom Right: As I mentioned, we were going for “scary owl
eyes”. We were at a loss how to make the
“feathers” frame the owls eyes so we tried our orange peel juicer thingy. Using this little tool I scrapped the design
around the face and I think it turned out great.
These are pictures of the final product! I'm very pleased with how our pumpkin turned out and it
was a fun little project! I think those eyes are pretty
darn scary in the dark!

We waited a few days to see how the pumpkin would survive
and much to my surprise, it looks even BETTER than it did the day we carved
it! The "meat" of the pumpkin has started
to turn white so it makes the contrast of the face stand out more! I think this can be attributed to the bleach
solution that we used to preserve our work.
I was worried about our pumpkin getting moldy and disgusting too soon so
we did a quick Internet search and learned that pumpkins last a lot longer if
clean them out with a light bleach solution.
So far so good! I’ll let you all
know how long our owl lasts!

I hope everyone has a hoot of a Halloween! Stay safe out there!
Comments
Post a Comment